Carbon Monoxide Detector Placement: The Ultimate Guide for Maximum Home Safety
Master carbon monoxide detector placement with our ultimate guide. Protect your family from the silent killer with expert installation tips and location advice.
Carbon Monoxide Detector Placement: The Ultimate Guide for Maximum Home Safety
“Master carbon monoxide detector placement with our ultimate guide. Protect your family from the silent killer with expert installation tips and location advice.”
Carbon monoxide (CO) is often called the “silent killer” for a terrifying reason: it is an invisible, odourless, tasteless gas that can be fatal before anyone even realises it is present. Protecting your family from this insidious threat begins with understanding carbon monoxide, its dangers, and crucially, mastering optimal carbon monoxide detector placement throughout your home. This comprehensive guide provides expert, evidence-informed advice on where to install carbon monoxide detectors to ensure the highest level of safety for everyone under your roof.
Understanding Carbon Monoxide: The Silent Killer
Before delving into where to install carbon monoxide detectors, it is vital to grasp what carbon monoxide is and why it poses such a significant danger.
What is Carbon Monoxide?
Carbon monoxide (CO) is a highly toxic gas produced by the incomplete combustion of carbon-containing fuels. Unlike many other hazardous substances, CO gives no warning signs through our senses. It has no colour, no smell, and no taste, making it incredibly deceptive.
How CO Affects the Body
When inhaled, carbon monoxide enters the bloodstream and binds with haemoglobin, the molecule in red blood cells responsible for carrying oxygen. CO binds to haemoglobin over 200 times more effectively than oxygen, forming carboxyhaemoglobin. This process effectively starves the body’s vital organs, including the brain and heart, of the oxygen they need to function. The severity of poisoning depends on the concentration of CO in the air and the duration of exposure.
Common Sources of Carbon Monoxide in the Home
CO is typically produced by fuel-burning appliances if they are faulty, poorly maintained, or improperly vented. Common household sources include:
- Boilers and Furnaces: Gas, oil, or solid fuel-burning heating systems.
- Water Heaters: Gas-fired water heaters.
- Fireplaces and Wood-Burning Stoves: Especially if chimneys are blocked or damaged.
- Gas Cookers and Ovens: Rarely a problem if well-maintained and used correctly, but can produce CO if faulty or left on.
- Portable Generators: Never to be used indoors or in enclosed spaces.
- Barbecues and Grills: Only for outdoor use; never bring indoors, even after use.
- Vehicle Exhaust: Running a car in an attached garage can quickly lead to dangerous CO levels.
Symptoms of Carbon Monoxide Poisoning
The symptoms of CO poisoning can be subtle and often mimic common illnesses like the flu, making diagnosis difficult without a CO detector.
- Mild Exposure: Headache, dizziness, nausea, fatigue.
- Moderate Exposure: Severe headache, confusion, vomiting, muscle weakness, blurred vision.
- Severe Exposure: Loss of consciousness, seizures, brain damage, coma, and ultimately, death.
Children, the elderly, and individuals with pre-existing heart or respiratory conditions are particularly vulnerable and may experience symptoms more rapidly or severely. According to a 2022 report by the US Centers for Disease Control and Prevention (CDC), accidental CO poisoning leads to tens of thousands of emergency department visits annually, highlighting the pervasive risk.
Key Takeaway: Carbon monoxide is an invisible, odourless, and tasteless gas produced by faulty fuel-burning appliances. It starves the body of oxygen and its symptoms can be easily mistaken for other illnesses, making carbon monoxide detector placement a crucial safety measure.
Types of Carbon Monoxide Detectors
Choosing the right type of carbon monoxide detector is the first step towards effective protection. Understanding the different options available helps ensure you select devices best suited for your home’s layout and your family’s needs.
1. Battery-Powered Detectors
These are the most common and versatile type. They operate independently of your home’s electrical system, making them ideal for locations without easily accessible power outlets or for homes prone to power outages.
- Pros: Easy to install, portable, functional during power cuts.
- Cons: Require regular battery replacement (typically annually), may chirp when batteries are low.
- Recommendation: Look for models with a sealed 10-year battery, eliminating the need for annual changes.
2. Mains-Powered (Plug-in) Detectors
These detectors plug directly into a standard electrical socket. Many models include a battery backup to ensure continuous operation during power failures.
- Pros: No need for battery changes (if mains-powered only), always on.
- Cons: Require an available electrical outlet, not functional during power cuts unless equipped with battery backup.
- Recommendation: Always choose models with a battery backup for uninterrupted protection.
3. Combination Smoke/CO Alarms
These devices integrate both smoke and carbon monoxide detection into a single unit. They are an efficient way to cover two major home hazards with one installation.
- Pros: Dual protection, fewer devices to install and maintain, often interconnected so all alarms sound if one detects a threat.
- Cons: If one sensor fails, the entire unit may need replacement.
- Recommendation: Ensure they meet relevant safety standards for both smoke and CO detection.
4. Smart/Connected Alarms
These advanced detectors connect to your home’s Wi-Fi network and can send alerts to your smartphone, even when you are away from home. They often integrate with smart home systems and offer features like voice alerts and remote testing.
- Pros: Remote notifications, integration with other smart home devices, enhanced monitoring.
- Cons: Typically more expensive, reliance on Wi-Fi connectivity.
- Recommendation: Check compatibility with your existing smart home ecosystem and ensure reliable Wi-Fi coverage in all installation areas.
Key Features to Look For
Regardless of the type, consider these features when purchasing carbon monoxide detectors:
- Digital Display: Shows current CO levels in parts per million (ppm), allowing you to monitor trends or minor leaks before they trigger a full alarm.
- Peak Level Memory: Records the highest CO level detected since the last reset, useful for investigating intermittent issues.
- End-of-Life Warning: Alarms typically have a lifespan of 5-7 years. A dedicated signal indicates when the unit needs replacing.
- Silence Button: Temporarily silences nuisance alarms, but should never be used to ignore a genuine CO alert.
- Certification: Look for detectors certified by recognised safety organisations (e.g., British Standards (BS EN 50291), UL, CSA).
Key Takeaway: A range of carbon monoxide detectors is available, including battery-powered, mains-powered, combination smoke/CO, and smart alarms. Prioritise models with a digital display, peak level memory, and an end-of-life warning, ensuring they meet relevant safety certifications.
Optimal Carbon Monoxide Detector Placement: General Principles
Effective carbon monoxide detector placement is paramount. While specific locations are crucial, several general principles apply to all installations. Ignoring these can compromise the detector’s ability to alert you to danger.
Understanding CO Dispersion
A common misconception is that carbon monoxide, being slightly lighter than air, will always rise to the ceiling like smoke. In reality, CO mixes readily with air and distributes fairly evenly throughout a room. Its density is very close to that of air, meaning it does not stratify significantly. This is why placement recommendations differ from those for smoke detectors, which are typically installed on ceilings.
“Carbon monoxide spreads throughout a space much like air itself,” explains a senior fire safety officer at the National Fire Protection Association (NFPA). “It’s not about whether it rises or falls, but ensuring the detector is in a position where it can effectively sample the air where people breathe and where CO sources might be active.”
Always Follow Manufacturer’s Instructions
The single most important rule for carbon monoxide detector placement is to always refer to and follow the manufacturer’s specific instructions. These instructions are tailored to the particular design and sensing technology of your device and often supersede general advice. Failure to follow them could invalidate warranties or, more critically, compromise the detector’s performance.
Where NOT to Place Detectors
Certain locations can interfere with the detector’s operation or lead to nuisance alarms, reducing their effectiveness. Avoid placing detectors:
- Directly above or near fuel-burning appliances: The detector should not be directly exposed to appliance fumes, which could trigger false alarms or overwhelm the sensor. Maintain a distance of at least 1-3 metres (3-10 feet).
- In direct sunlight or near heat sources: Extreme temperatures can affect sensor accuracy and shorten the detector’s lifespan.
- In very humid or damp areas: Such as bathrooms or laundry rooms, as moisture can damage electronics and lead to false alarms. Maintain a distance of at least 1.5 metres (5 feet) from showers or excessive humidity.
- Near windows, doors, or ventilation openings: Air currents from these areas can dilute CO concentrations around the detector or prevent CO from reaching it, delaying detection.
- In “dead air” spaces: Corners where walls and ceilings meet, or areas obstructed by furniture, can prevent CO from circulating properly to the sensor.
- Near cleaning products or strong chemicals: Sprays, paints, and solvents can damage the sensor or cause false alarms.
- In garages: Vehicle exhaust contains CO, which will frequently trigger alarms. If you have an attached garage, place the detector inside the living space, near the door connecting to the garage, rather than inside the garage itself.
- In extremely dusty, dirty, or greasy areas: Such as workshops or very busy kitchens, as debris can clog sensors.
Mounting Height Considerations
Most manufacturers recommend installing CO detectors at roughly eye level or on a wall between waist height and ceiling level. This is because CO mixes evenly with air, and this height range allows for effective sampling of the air in the breathing zone. However, always defer to the manufacturer’s specific guidance, as some models may be designed for ceiling mounting.
A general guideline is to mount the detector at least 15 cm (6 inches) from the ceiling and at least 1 metre (3 feet) from the floor.
Number of Detectors Required
For comprehensive protection, safety organisations like the World Health Organisation (WHO) and the UK’s Gas Safe Register recommend installing multiple carbon monoxide detectors. A single detector is rarely sufficient for an entire home.
“To truly safeguard a household, multiple CO detectors are not just a recommendation, they are a necessity,” states a spokesperson for the WHO’s environmental health programme. “Every level of the home, and particularly areas around sleeping quarters and fuel-burning appliances, needs this critical protection.”
Minimum Recommendation: * One detector on every level of the home. * One detector in or near every sleeping area.
Optimal Recommendation: * One detector in or near every sleeping area. * One detector near or within 1-3 metres (3-10 feet) of every major fuel-burning appliance (boiler, furnace, water heater). * Additional detectors in frequently occupied rooms (e.g., living room with a fireplace). * Consider a detector in an attached garage, positioned inside the living space near the connecting door.
| Placement Zone | Recommended Number of Detectors | Rationale |
|---|---|---|
| Every Sleeping Area | 1 per area | Protects occupants while they are most vulnerable (asleep). |
| Every Level of Home | 1 per level | Ensures detection regardless of CO source or air movement. |
| Near Appliances | 1 per major appliance | Early detection of leaks from primary CO sources. |
| Attached Garage Access | 1 near door | Alerts to CO entering from vehicle exhaust or garage appliances. |
| Occupied Basements | 1 | Basements often house appliances and are frequently used. |
Key Takeaway: Carbon monoxide mixes evenly with air, so detectors should be placed at eye level or between waist and ceiling height, following manufacturer instructions precisely. Avoid direct heat, humidity, drafts, or dead air spaces. Install at least one detector on every level and in or near every sleeping area for comprehensive protection.
Specific Carbon Monoxide Detector Placement Zones and Why
Achieving maximum home safety requires strategic placement of carbon monoxide detectors in key areas. This section details the most critical zones and the reasoning behind these recommendations.
1. In or Near Every Sleeping Area
This is arguably the most critical placement zone. People are most vulnerable to carbon monoxide poisoning while they are asleep because they may not wake up or recognise the symptoms.
- Placement: Install a detector inside each bedroom or in the hallway immediately outside of sleeping areas. If a hallway serves multiple bedrooms, place it centrally.
- Rationale: Ensures occupants are alerted to dangerous CO levels when they are least able to respond. Early warning is vital to allow for safe evacuation.
- Actionable Next Step: Conduct a walkthrough of your home, identifying all bedrooms and adjacent hallways. Prioritise these locations for detector installation.
2. Near Fuel-Burning Appliances
Placing detectors close to potential CO sources allows for the earliest possible detection of a leak.
- Boilers, Furnaces, Water Heaters: Position a detector within 1-3 metres (3-10 feet) of these appliances. Avoid placing it directly on the appliance or in its exhaust stream.
- Rationale: These are primary sources of CO if they malfunction. Early detection here can prevent CO from spreading throughout the home.
- Fireplaces and Wood-Burning Stoves: Install a detector in the room where these are used, maintaining the 1-3 metre distance.
- Rationale: Blocked chimneys or improper ventilation can quickly lead to high CO levels.
- Gas Cookers and Ovens: In kitchens with gas appliances, a detector can be beneficial. However, ensure it is placed far enough from cooking fumes (at least 3 metres or 10 feet) to prevent nuisance alarms, and not in an area of high humidity.
- Rationale: Faulty gas hobs or ovens can emit CO.
- Attached Garages: If your home has an attached garage, place a CO detector inside the living space, near the door that connects to the garage.
- Rationale: Vehicle exhaust or fuel-burning appliances (like heaters) in the garage can produce CO that infiltrates the living areas. Never place a detector inside the garage itself, as vehicle exhaust will frequently trigger nuisance alarms.
- Actionable Next Step: Locate all fuel-burning appliances in your home. Identify the best placement for a detector within the recommended distance, ensuring it is not directly in the exhaust path.
3. On Every Level of the Home
Carbon monoxide can travel through a building via stairwells, ventilation systems, and even porous materials. Placing detectors on every level ensures comprehensive coverage.
- Basements: Basements often house furnaces, water heaters, and laundry appliances. Install a detector here, especially if it is a finished or regularly occupied space.
- Rationale: CO can accumulate in lower levels, and appliances here are common sources.
- Upper Floors: CO can rise, so detectors are necessary on all upper levels, particularly near bedrooms.
- Rationale: Ensures detection even if the source is on a lower floor and CO has migrated upwards.
- Attics (if occupied or with appliances): If your attic is a living space or contains a boiler, install a detector.
- Rationale: Any occupied space with a potential CO source needs protection.
- Actionable Next Step: Count the number of levels in your home, including occupied basements and attics. Ensure each has at least one detector.
4. Placement in Specific Rooms
While the general rules cover most scenarios, some specific room types require particular attention.
- Living Rooms/Family Rooms: If these rooms contain a fireplace, gas heater, or other fuel-burning appliance, a CO detector is recommended.
- Utility Rooms: Often contain washing machines, tumble dryers, and sometimes boilers. A detector here offers additional protection.
- Dedicated Appliance Rooms: Any room specifically designed to house heating or water heating systems must have a CO detector.
Summary of Optimal Placement
Consider the following table for a quick reference on carbon monoxide detector placement:
| Location Category | Specific Placement | Why it’s Important |
|---|---|---|
| Sleeping Areas | Inside each bedroom or in the hallway outside | Protects vulnerable occupants during sleep; allows for timely evacuation. |
| Fuel-Burning Appliances | Within 1-3 metres (3-10 ft) of boilers, furnaces, fireplaces | Early detection of leaks from primary CO sources; avoids direct exhaust exposure. |
| Every Home Level | On each floor, including basements and attics (if occupied) | Ensures comprehensive coverage as CO can travel throughout the home; protects against sources on any level. |
| Attached Garage | Inside the home, near the door connecting to the garage | Detects CO infiltration from vehicle exhaust or garage appliances before it spreads into living areas. |
| Height | Eye level, or between waist and ceiling height (follow manufacturer) | CO mixes evenly with air; ensures detector samples air in the breathing zone. |
Key Takeaway: For maximum safety, place carbon monoxide detectors in or near every sleeping area, within 1-3 metres of fuel-burning appliances, and on every level of the home. Always refer to manufacturer guidelines for precise mounting height and distance.
The Science of CO Dispersion and Detector Response
Understanding the underlying science of how carbon monoxide behaves and how detectors are designed to respond provides confidence in proper carbon monoxide detector placement.
CO’s Behaviour in Air: More Than Just Rising
As previously mentioned, CO’s density is very similar to that of air. This means it doesn’t simply float to the ceiling or sink to the floor. Instead, it mixes with the air in a room, much like any other gas. Air currents, temperature differences, and the operation of heating/cooling systems can influence its movement, but it will generally disperse throughout the entire volume of a space.
This uniform dispersion is why CO detectors are often recommended at different heights than smoke detectors. Smoke, containing hot particulate matter, tends to rise. CO, being a gas at ambient temperature, does not reliably rise. Placing detectors at breathing height ensures they sample the air that occupants are exposed to.
Understanding Alarm Thresholds and Response Times
Carbon monoxide detectors are designed to alarm at specific CO concentrations over a period of time, rather than instantly. This is because low levels of CO are often present in ambient air, and a sudden, brief spike might not pose an immediate threat. The standards for CO alarms (e.g., British Standard EN 50291, UL 2034) define these thresholds.
Typical Alarm Thresholds (as per EN 50291):
- 50 ppm (parts per million): Alarm within 60-90 minutes.
- 100 ppm: Alarm within 10-40 minutes.
- 300 ppm: Alarm within 3 minutes.
These varying response times are crucial. A low, prolonged exposure (e.g., 50 ppm for an hour) can still be dangerous, causing symptoms like headaches and nausea. A high concentration (e.g., 300 ppm) requires immediate evacuation due to its rapid, life-threatening effects. Digital displays on some detectors provide real-time readings, allowing you to see lower, non-alarming levels of CO that might indicate a developing problem.
Why Multiple Detectors are Crucial
Given CO’s dispersion characteristics and the varied response times, relying on a single detector for an entire home is inadequate.
- Localised Sources: A leak from a boiler in the basement might be detected there first, allowing for earlier action before CO levels become critical on upper floors.
- Travel Time: While CO mixes, it still takes time to travel from one area to another. A detector near the source and another near sleeping areas provides layered protection. If the source detector fails or is slow to react, the sleeping area detector acts as a backup.
- Vulnerability During Sleep: As mentioned, people are most vulnerable when asleep. A detector in or near sleeping areas provides direct protection during these critical hours.
- Differing Concentrations: CO concentrations can vary in different parts of a home, depending on ventilation, room size, and proximity to the source. Multiple detectors account for these variations.
The Importance of Regular Testing
Even with optimal carbon monoxide detector placement, regular testing is non-negotiable. Detectors contain electrochemical sensors that can degrade over time or be affected by environmental factors.
- Monthly Testing: Press the “Test” button monthly. This checks the battery, electronics, and alarm function. The alarm should sound loudly.
- Battery Replacement: If your detector uses replaceable batteries, change them at least once a year (e.g., when daylight saving time changes). Detectors with sealed 10-year batteries do not require this.
- End-of-Life Replacement: All detectors have a limited lifespan, typically 5-7 years, after which the sensor’s accuracy can no longer be guaranteed. Replace the unit immediately when it signals its end-of-life (often a specific pattern of chirps or a display message). According to the UK’s Health and Safety Executive (HSE), failing to replace CO alarms at the end of their service life is a common oversight that significantly increases risk.
Key Takeaway: Carbon monoxide mixes evenly with air, so detectors are placed to sample breathing zones. Alarms respond to specific CO concentrations over time, necessitating multiple detectors throughout the home for comprehensive, layered protection. Regular monthly testing and timely replacement at the end of the unit’s lifespan are essential.
Installation Best Practices
Once you have identified the optimal carbon monoxide detector placement, proper installation ensures the devices function effectively and reliably.
Mounting Height and Location
While general guidelines suggest eye-level or between waist and ceiling height, always prioritise the manufacturer’s instructions.
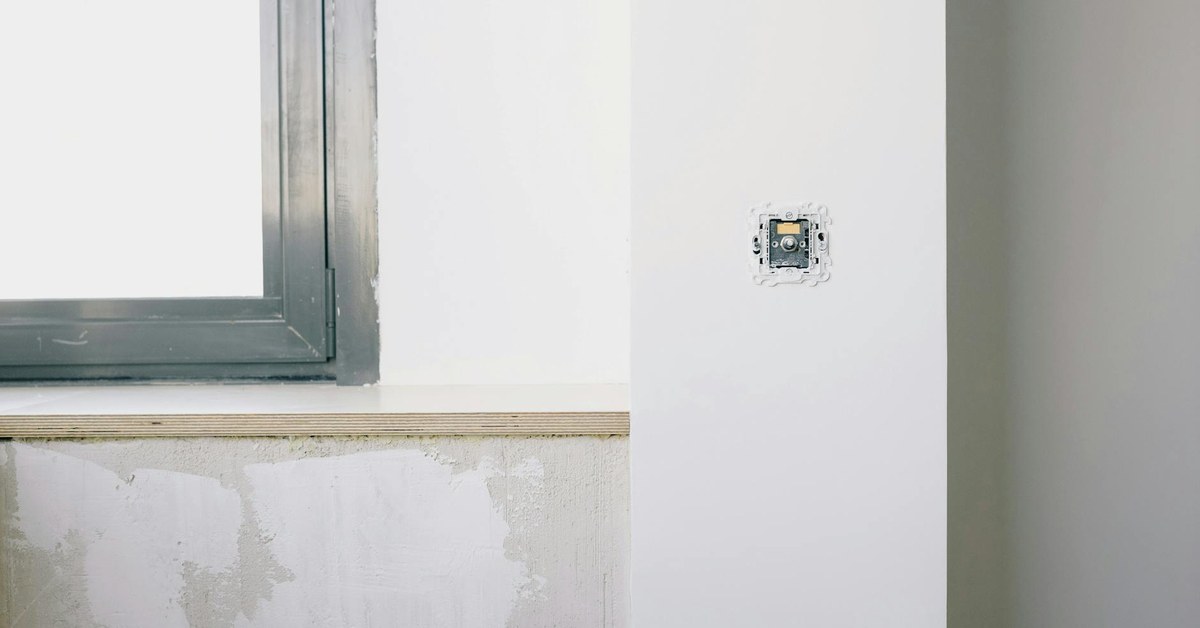
- Wall Mounting: Most CO detectors are designed for wall mounting. The general recommendation is to mount them at least 15 cm (6 inches) from the ceiling and at least 1 metre (3 feet) from the floor. This places them within the typical breathing zone.
- Ceiling Mounting: Some combination smoke/CO alarms are designed for ceiling mounting, as this is optimal for smoke detection. If you choose a combination unit, ensure its CO sensor is specifically designed to function effectively from a ceiling position, which often involves a different sensor configuration or processing.
- Plug-in Detectors: These simply plug into a standard electrical socket. Choose an outlet that is not obstructed by furniture and is at a height where the detector can effectively sample the air, ideally not directly behind large appliances.
Avoiding Obstructions
Ensure the detector’s vents or sensor openings are clear and unobstructed.
- No Curtains or Furniture: Do not place detectors behind curtains, large pieces of furniture, or anything that could block the flow of air to the sensor.
- Clearance: Allow for clear space around the detector, typically at least 30 cm (1 foot) in all directions, unless otherwise specified by the manufacturer.
Step-by-Step Installation Guide (General)
Follow these general steps for installing a wall-mounted carbon monoxide detector:
- Read the Manual: Thoroughly read the manufacturer’s instruction manual for your specific model.
- Choose the Location: Select the optimal carbon monoxide detector placement based on the guidelines above and the manual.
- Mark Mounting Holes: Hold the mounting bracket (if provided) or the detector itself against the wall in the chosen spot. Use a pencil to mark the locations for the screw holes.
- Drill Pilot Holes: Use a drill bit slightly smaller than the screws to drill pilot holes at your marked spots. If mounting into plasterboard, you may need wall anchors (raw plugs) to ensure a secure fit.
- Attach Mounting Bracket: Secure the mounting bracket to the wall using the screws provided.
- Install Batteries: If it’s a battery-powered unit, insert the batteries, ensuring correct polarity.
- Attach Detector: Mount the detector onto the bracket, often with a twisting motion, until it clicks securely into place.
- Test the Alarm: Press and hold the “Test” button until the alarm sounds. This confirms the unit is functioning correctly. If it doesn’t sound, troubleshoot according to the manual (check batteries, re-seat the unit, etc.).
- Record Installation Date: Note the installation date on the detector itself or in a home maintenance log. This helps you track its lifespan.
Interconnected Alarms
For multi-storey homes or larger properties, consider interconnected CO alarms. If one alarm detects CO, all interconnected alarms throughout the home will sound. This provides earlier warning, particularly for those in distant rooms or on different floors. Interconnection can be wired (requiring professional installation) or wireless.
- Product Recommendation: Look for wireless interconnected carbon monoxide alarms or combination smoke/CO alarms that can link together via radio frequency.
Key Takeaway: Proper installation is crucial for detector effectiveness. Always follow manufacturer instructions for mounting height, typically eye-level or between waist and ceiling, ensuring no obstructions. Test the alarm immediately after installation and consider interconnected systems for enhanced safety in larger homes.
Maintenance and Lifespan of CO Detectors
Installing detectors is only half the battle; maintaining them and replacing them at the end of their service life are equally critical. A neglected detector is a false sense of security.
Regular Testing
- Monthly Test: Press the “Test” button on each detector once a month. This checks the battery, electronics, and the alarm’s sounder. The alarm should sound loudly. If it doesn’t, replace batteries or the unit.
- Holiday Testing: Test all detectors before leaving for an extended holiday and upon returning, especially if you have mains-powered units susceptible to power outages.
Battery Replacement
- Annual Replacement: For detectors with replaceable batteries, change them at least once a year. A good reminder is to do this when the clocks change for daylight saving.
- Low Battery Warning: Most detectors will emit a distinct “chirp” or beep every 30-60 seconds to indicate a low battery. Replace the batteries immediately.
- Sealed 10-Year Batteries: Many newer models feature sealed, non-replaceable 10-year lithium batteries. These are designed to last the entire lifespan of the detector, eliminating annual battery changes.
Cleaning and Maintenance
Dust, dirt, and debris can accumulate on the detector’s vents and interfere with its sensor.
- Regular Cleaning: Gently vacuum the detector’s vents using a soft brush attachment or wipe it with a slightly damp cloth (never spray cleaners directly onto the unit) at least once a year.
- Avoid Chemicals: Do not use cleaning sprays, solvents, or air fresheners near the detector, as these can damage the sensor or cause false alarms.
Detector Lifespan and Replacement
Carbon monoxide detectors do not last indefinitely. Their electrochemical sensors degrade over time, losing sensitivity and accuracy.
- Typical Lifespan: Most CO detectors have a lifespan of 5-7 years. Always check the manufacturer’s recommended replacement date, which is often printed on the back or side of the unit.
- End-of-Life Signal: When a detector reaches the end of its operational life, it will emit a specific “end-of-life” warning, usually a series of chirps different from a low battery warning. This signal means the unit must be replaced immediately, even if it appears to be working.
- Record Date: Make a note of the installation date and the replacement date on the detector itself using a permanent marker, or record it in a home maintenance log.
Maintenance Checklist for CO Detectors:
| Task | Frequency | Action